使用Github Actions自动化构建exe
上一篇讲了 coding 的自动化 build exe 文件,这篇来说下使用 Github Actions 的持续集成功能来自动化构建我们的 exe 文件。由于上一篇中所用的测试脚本是我自用的,所以就没有放出来,这篇咱们来新建一个简单的测试脚本来体验自动化编译。
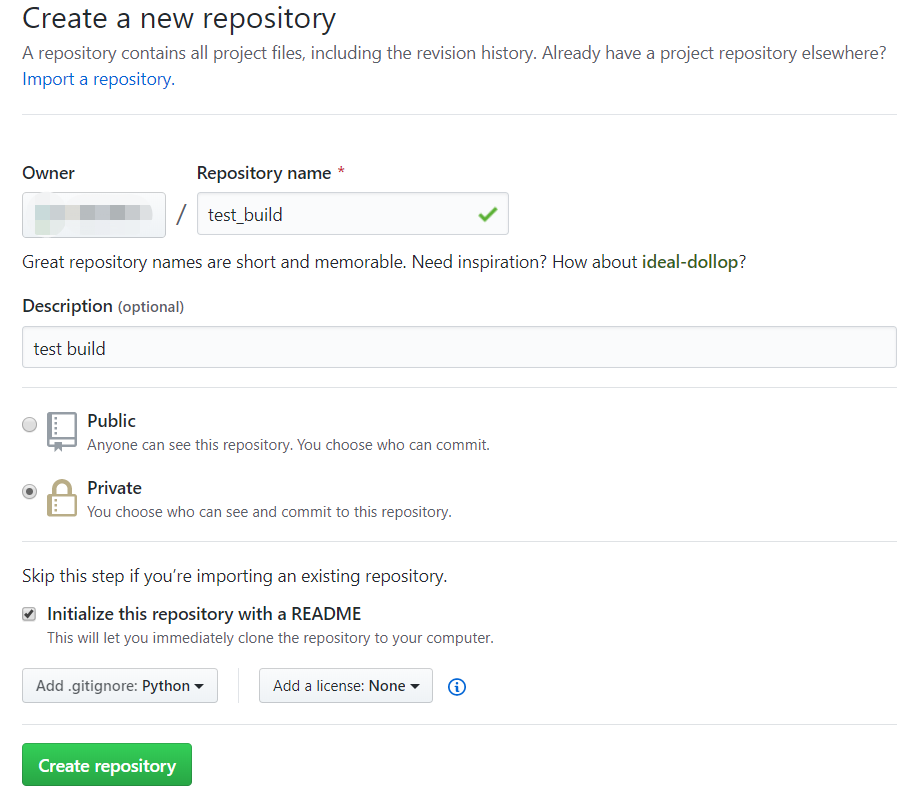
创建仓库
首先到 Github 上新建一个仓库
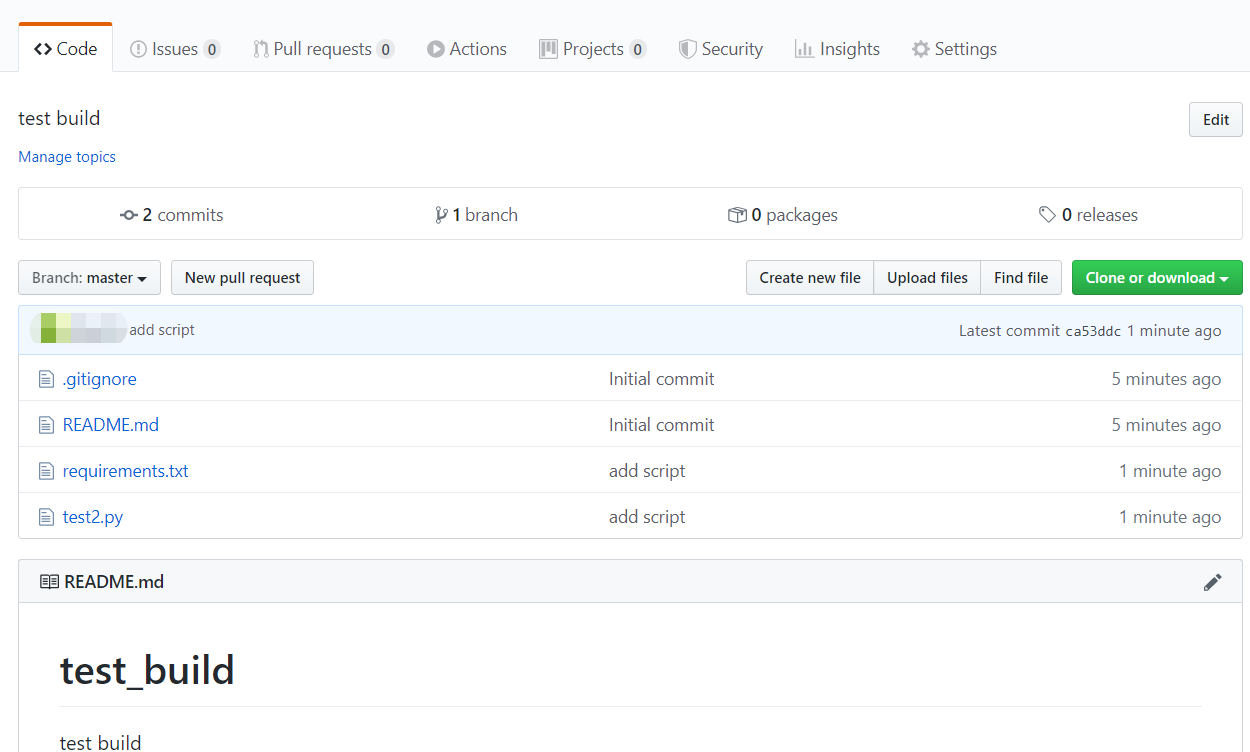
添加代码
然后将新建的仓库 clone 下来,添加我们的测试脚本,代码如下:
1 | import requests |
因为要依赖 requests 库,所以要添加 requirements.txt 文件方便安装依赖。
提交更改
添加完文件后使用命令 git add . | git commit -m "add script" |git push 来 push 更改。
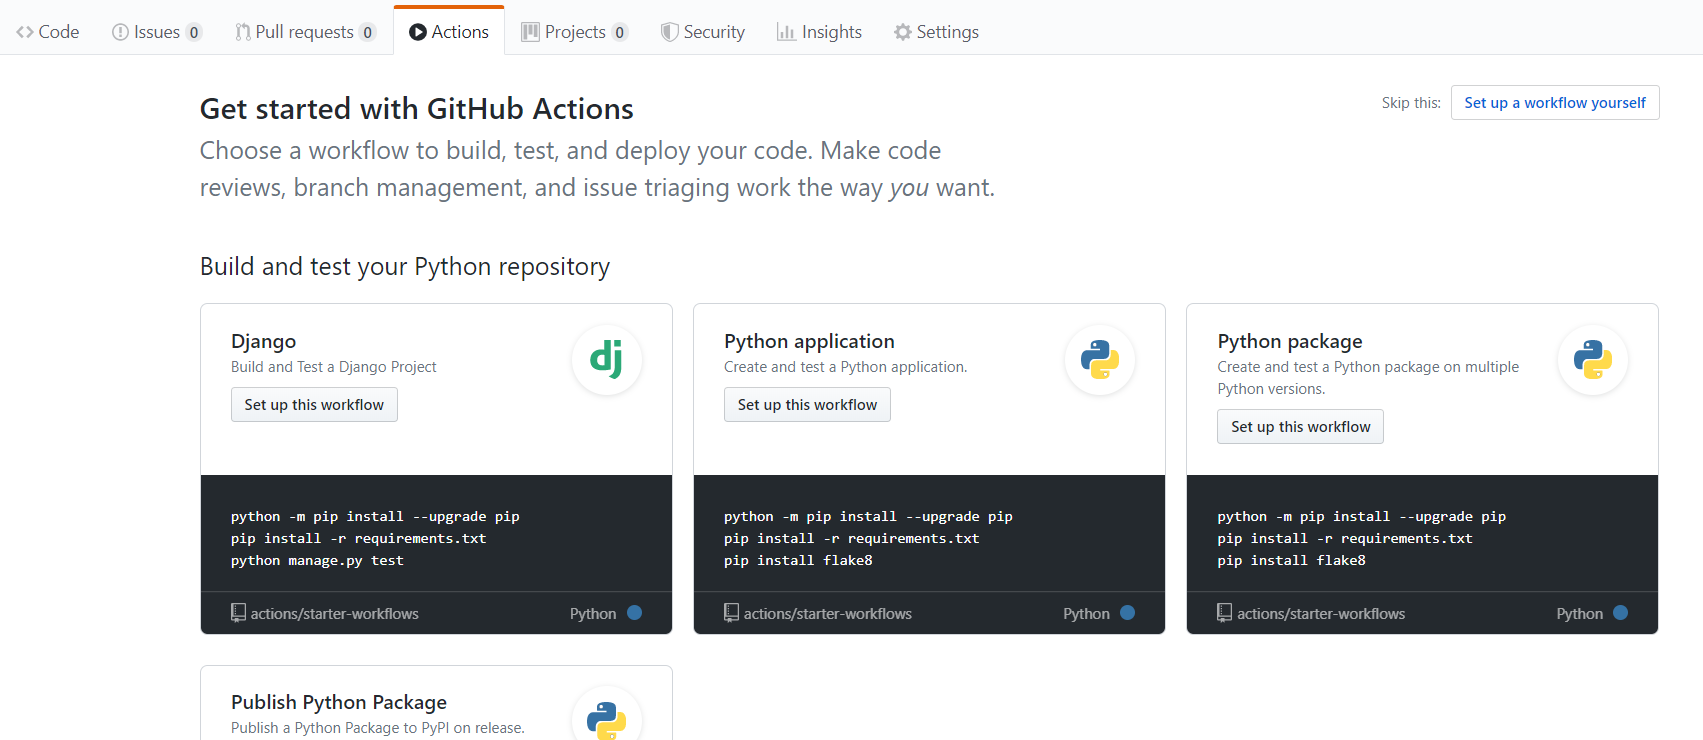
新建持续集成任务
点击 Actions 按钮,由于我们这里仍然使用上一篇文章使用过的 docker 镜像来编译我们的 exe 文件,所以我们这里建立一个自定义的 workflow 文件。点击右上角的按钮。
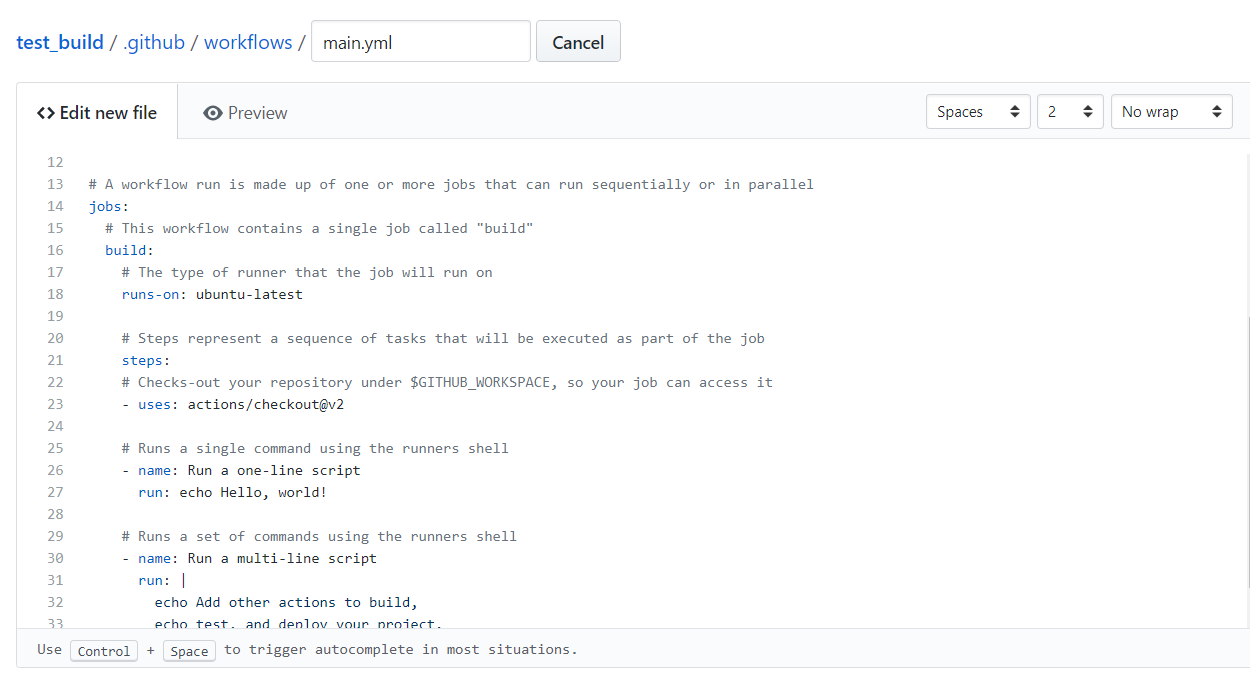
自定义持续集成任务
左边为 yml 文件,文件名可以自定义,Github 会自动运行其中定义的 job。
我们更改 yml 文件,修改成下面的代码
1 | # This is a basic workflow to help you get started with Actions |
开始构建
点击右上角的 commit 按钮,刷新页面,Github 已经自动开始自动构建了。
结束构建
稍等一会,构建完成后,成功了,我们去 release 界面查看,发现我们已经创建了一个新的版本,并且也成功上传了对应的 zip 文件。
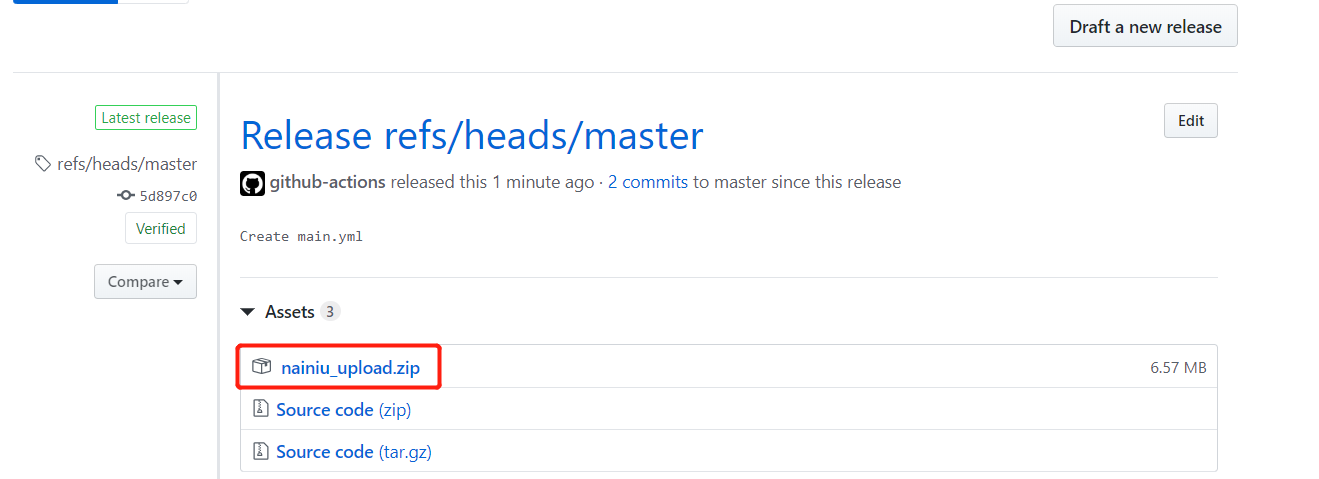
只是这里我们没有对本次 commit 添加 tag,所以没有版本号。
本篇文章所用到的 docker 镜像和上篇文章所用的一致,均为 这个。
所以具体参数不再详细解释。
结语
Github Actions 和 coding 其实都用了同一个 docker 镜像,只是换了个平台,一些命令稍有些不一样。而且 Github 同样提供了 Windows 平台,可以通过 Windows 直接安装依赖,编译 exe 文件,不需要 docker。
但是 Windows 平台运行所需分钟数是 Linux 的两倍,所以选用 Linux 平台可以节省一些分钟数。当然了,如果是开源项目的话,那构建是完全免费的,没有每个月的限制。
以上就是本篇文章的全部内容。
参考链接:
https://help.github.com/en/actions
本文章首发于个人博客 LLLibra146’s blog
本文作者:LLLibra146
更多文章请关注公众号 (LLLibra146):
版权声明:本博客所有文章除特别声明外,均采用 © BY-NC-ND 许可协议。非商用转载请注明出处!严禁商业转载!